ACCOUNTHUB — SETUP GUIDE
This is the AccountHub setup guide. Unlike official connectors, you can search and act across multiple accounts. The bar above always shows which STEP you're on. Setup takes about 5 minutes.
AccountHub's Google app completed Google's verification on 26 August 2026. AccountHub is currently in Founding Beta, and access is expanding gradually.
accounthub.ai — open it and sign in. If it's your first visit, you'll be signed up automatically.
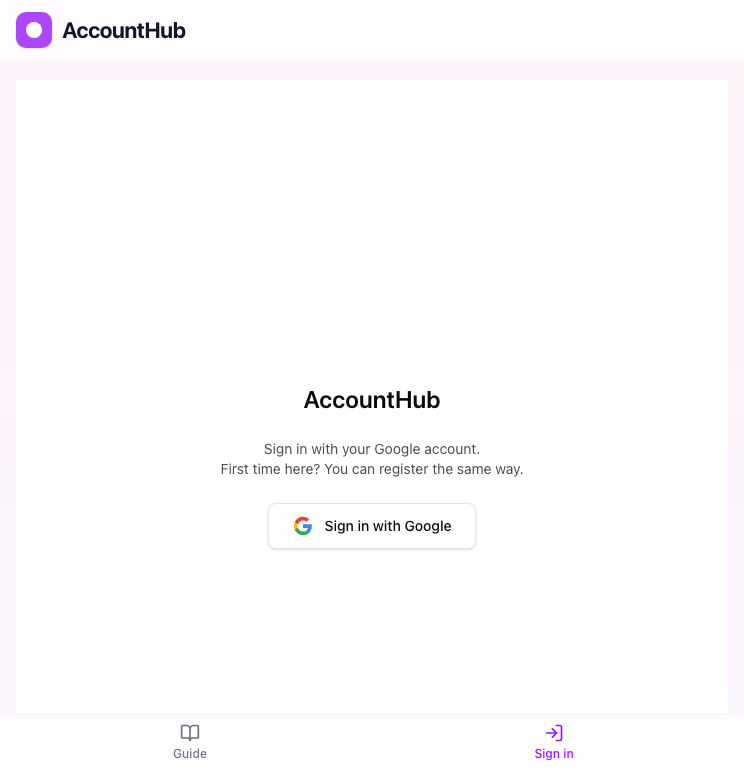
Once you're signed in, open Settings and tap "Connect a Google account". This opens the Google account picker described next.
On the screen that opens, choose the Google account you want to connect. If you have more than one, connect them one at a time from the same button. Gmail, Calendar, and Drive all become available from this single connection. You can add Slack workspaces later.
AccountHub completed Google's app review (OAuth verification) on 26 August 2026. Choosing an account takes you straight to the access-scope screen — the old "This app isn't verified" warning is not shown.
* Google shows the consent screen in your Google account or browser's language, so it may look different from the screenshots below.
Go to Settings and tap "Connect a Slack workspace". This opens the Slack permission screen described next.
You can connect multiple Slack workspaces together too.
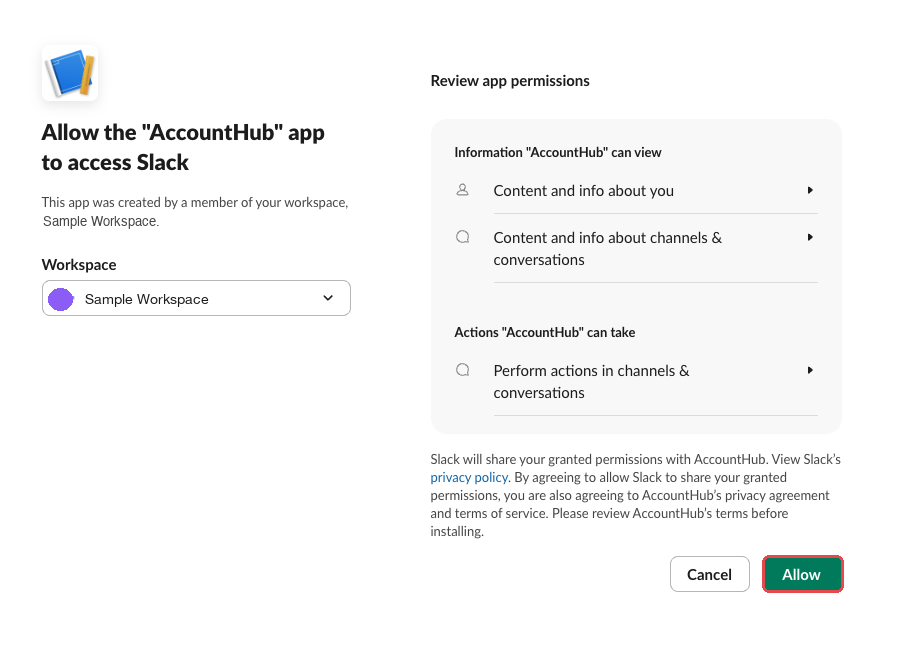
The "App is not approved by Slack" notice is also expected — it's because the app hasn't been reviewed yet.
The AI can post to public channels and DMs right away. For a private channel, you'll still need to invite the bot to it in Slack first.
Once connected, the "Accounts" screen shows your connected accounts and which services are available. You can connect multiple Google accounts and Slack workspaces together.
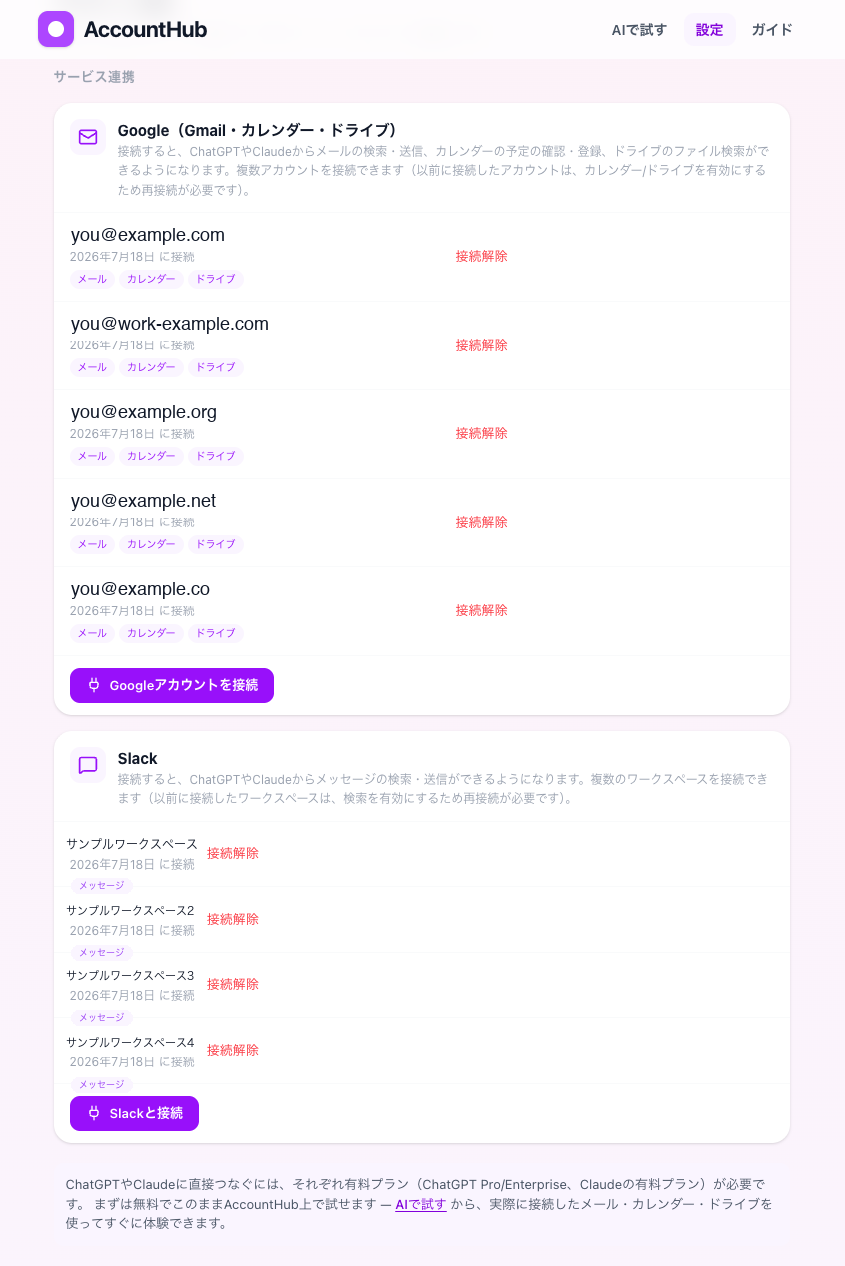
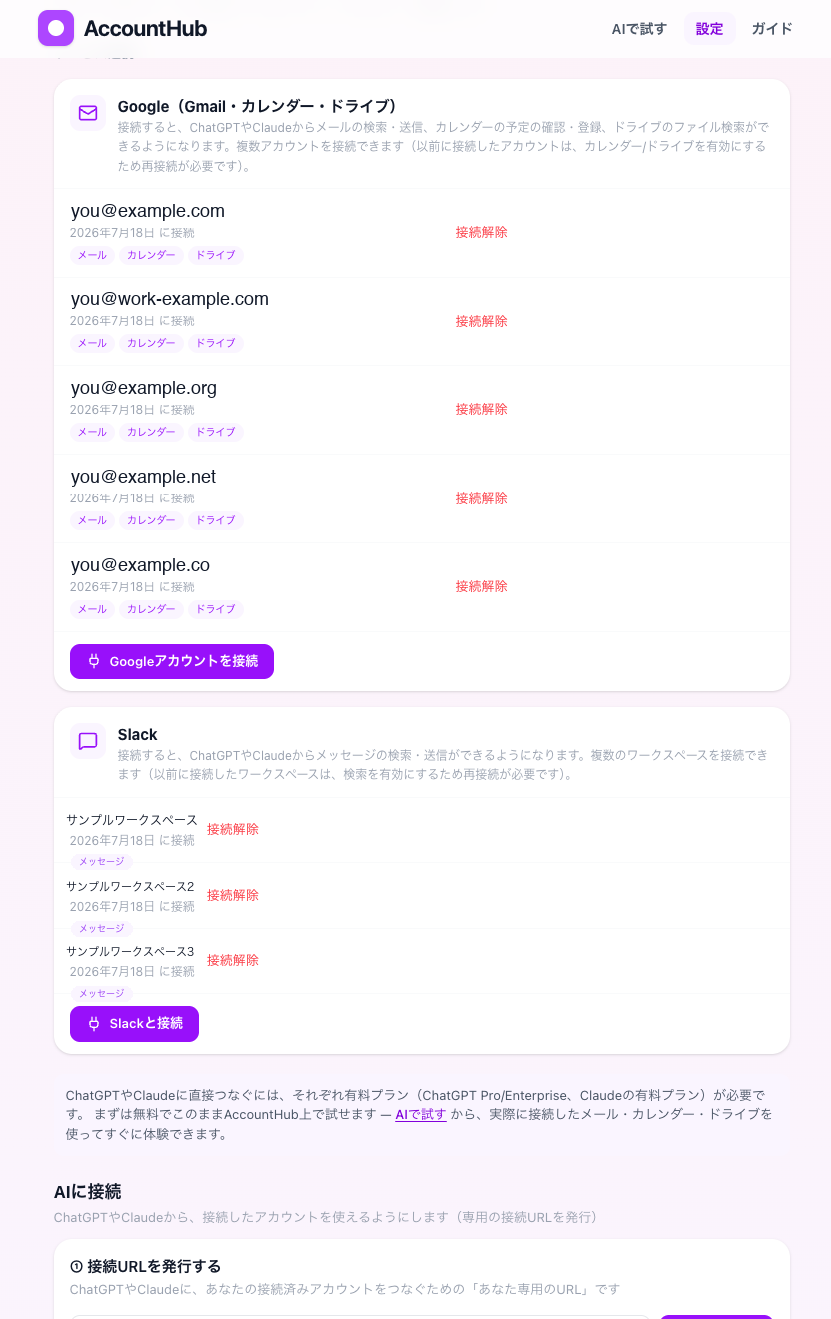
Even without ChatGPT or Claude, you can ask the AI right inside the app — things like "find last week's invoice emails." Just open Try the AI and ask about the email, calendar, and Drive accounts you've connected (free).

Try asking things like this
Copy an example as-is and paste it into the "Try the AI" chat to try it.
Issue your personal connect URL from "Connect to AI" in the nav, using "Issue and copy a connect URL". One press issues it and copies it at the same time.
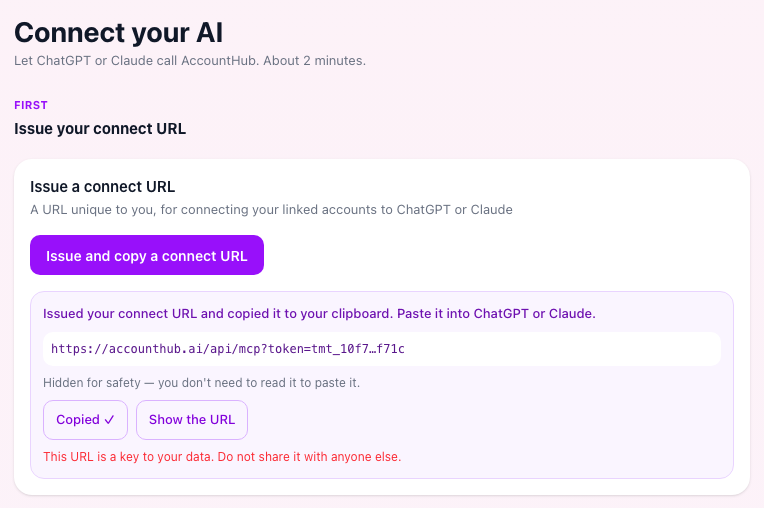
Register the connect URL you issued with the AI assistant you use. Pick an assistant in the tabs below to see its steps.
✓ Setup complete. Try asking your new chat things like this:
"Show me the important-looking unread email across all my accounts"
"Search Slack and email together for last week's exchange with Alex"
"Pull today's schedule from all my calendars"
AI responses have a real cost behind the scenes, so a paid plan may be introduced if this continues to be offered long-term.
Provided and operated by: UK G.K. / August 2026 edition — Privacy Policy
Register from ChatGPT's settings as a new plugin (connector). Developer mode is available on Plus/Pro/Business/Enterprise/Edu, and the extra steps can only be done in a desktop browser (once added, you can use it from the phone/PC app too). Plus/Pro is mostly read-focused; write actions may be limited depending on your plan.
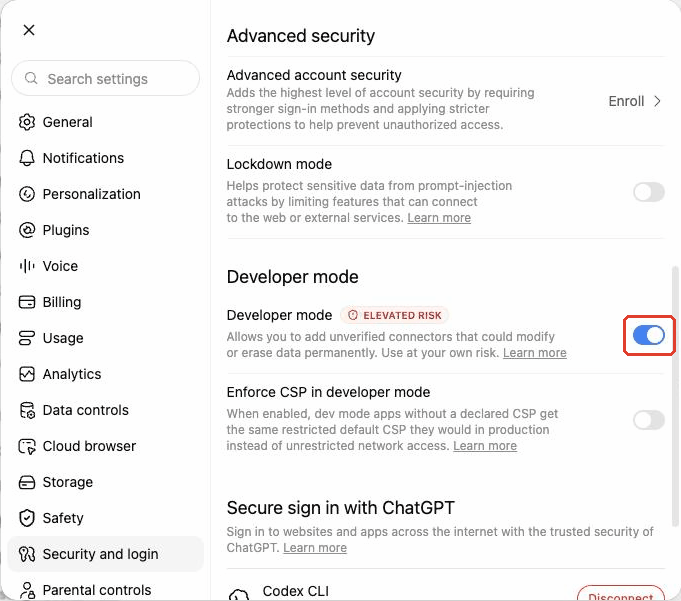
chatgpt.com/plugins page, a different screen from the one with the Developer mode toggle). Turning on Developer mode makes a "+" button appear in the top right — click it. If you can't find the "+", try typing "chatgpt.com/plugins" directly into your browser's address bar.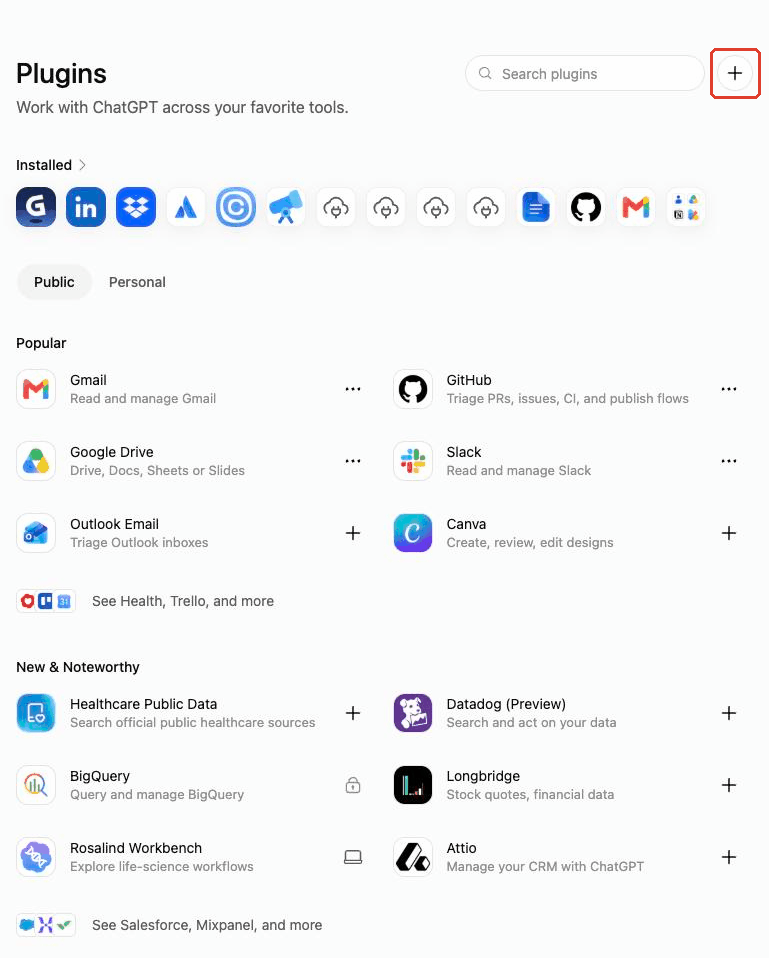
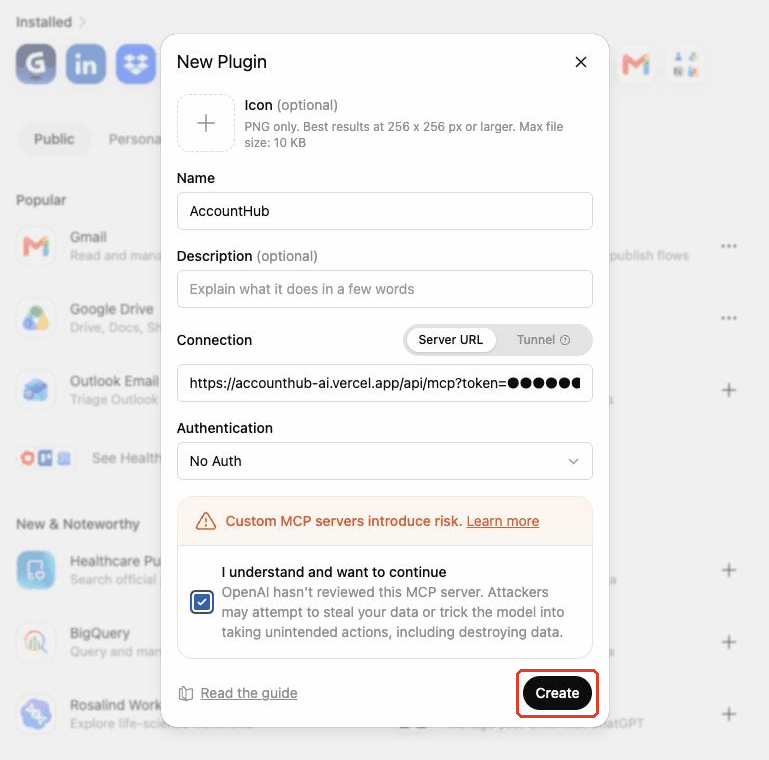
token=… in the URL is your personal key (blurred in the screenshot). Don't share it with anyone.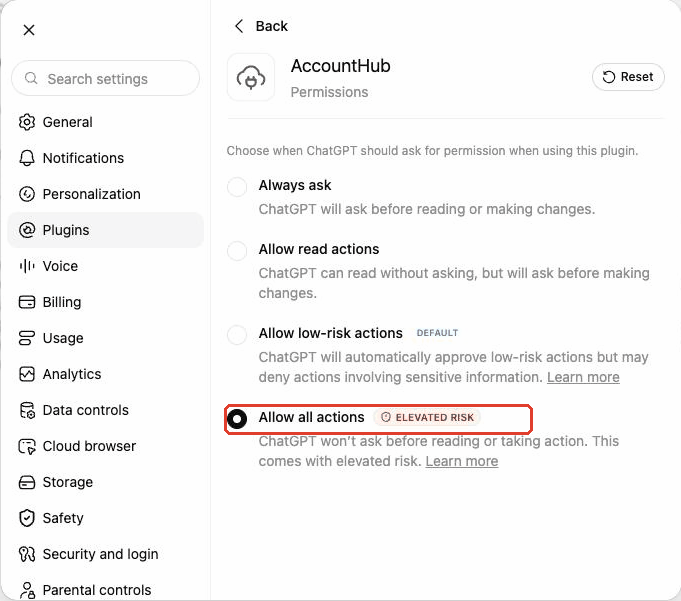
Register with Claude (claude.ai) as a custom connector.
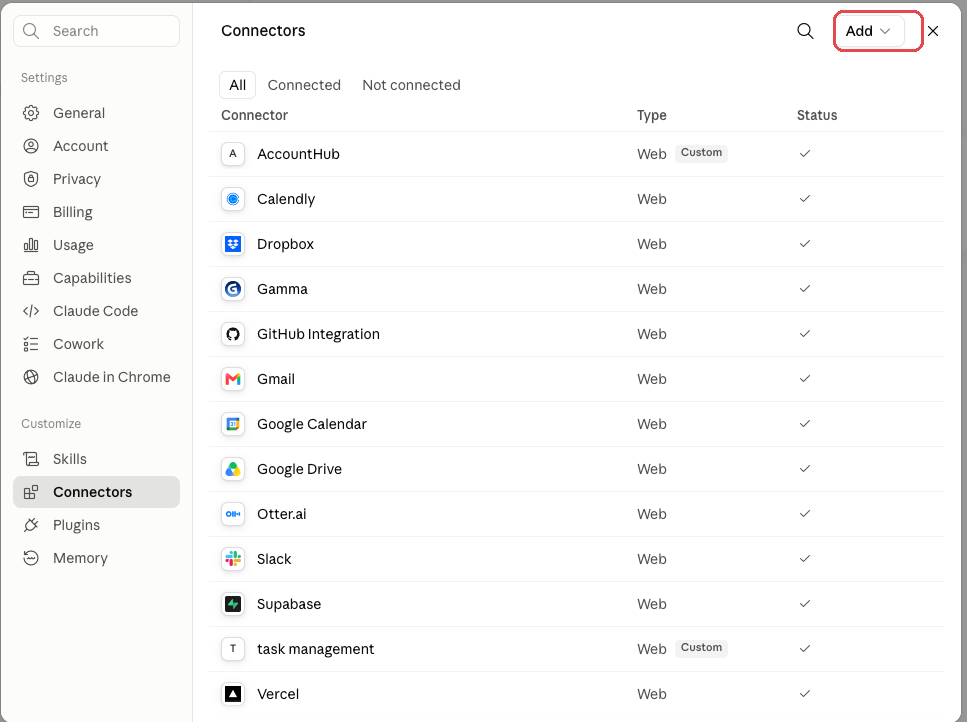
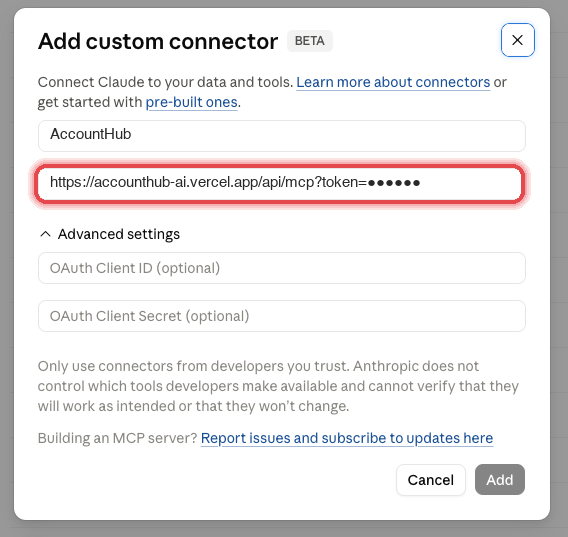
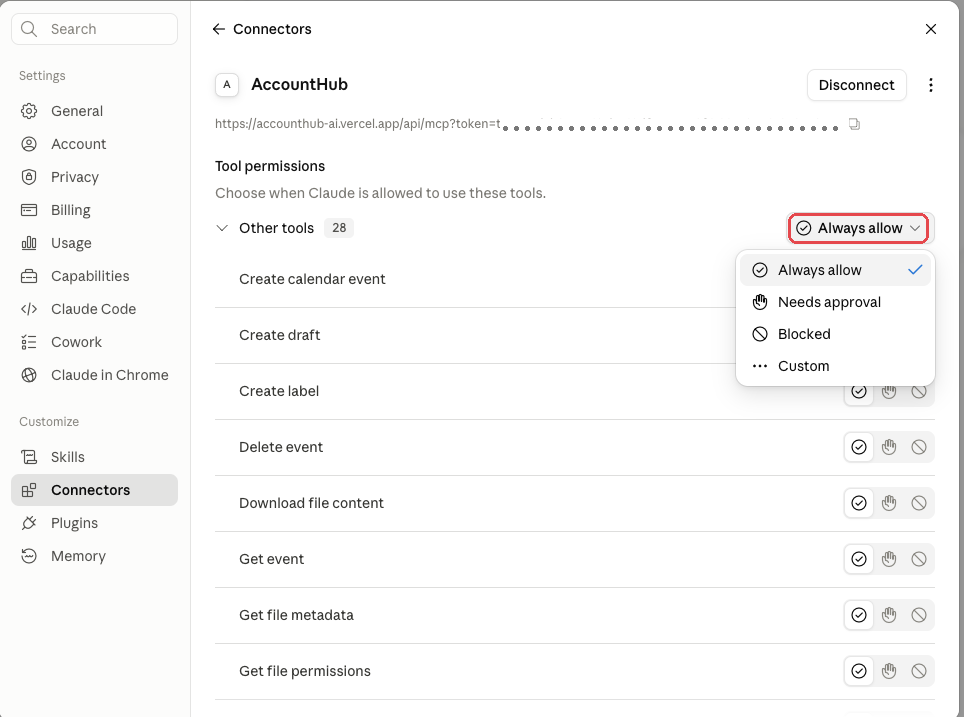
token=… in the URL shown at the top is your personal key (blurred in the screenshot). Don't share it with anyone.Run the following command in your terminal (new features are available from your next session).
claude mcp add --transport http accounthub <connect URL><connect URL> — replace this with the connect URL you issued in STEP 3a. The token=… in the URL is your personal key. Don't share it with anyone.